Laurie Bellet
 The study of Edot Yisraeil is a staple of 5th grade curriculum in both day schools and in supplemental programs. At Oakland Hebrew Day School, midway through the year, our 5th grade students become immersed in the cultural life of each of five edot (Iraq, Morocco, Yemen, Ethiopia and Ashkenaz) through experiences in cooking, music, dance, history and art. Over the course of the past few years, I have worked closely with our Judaic studies teachers and our Israeli shlichim to innovate art activities which are of authentic quality, offer challenging processes to the students and which culminate in satisfying products. Over the next few weeks, I will focus on art experiences to enhance your edot unit. Each activity, process and product, can be adapted for other learning content areas.
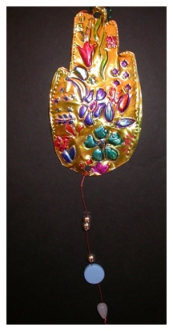
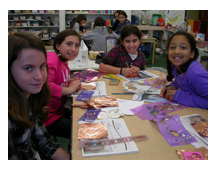
 This past week, students visited the Art Studio to complement their Iraqi edah studies by making foil hamsot. The Iraqi artisans are well regarded for their hamsah amulets and you can find many fine art examples by searching online images. For this 60 minute activity, we use ‘tooling foil,’ a pliable metal product. You can purchase rolls of 36 (or up to 40) gauge tooling foil in aluminum, copper or gold colors from Nasco Arts and Crafts. Nasco also offers pre-cut tooling foil squares (5”) in copper. Every student needs a wood stylus or a ball point pen (or any similar tool with a point) to carve into the foil and it is helpful to provide an assortment of decorative stencils. Each student will also need a cushion of newspapers under their work.
 This year, we used the aluminum color (funds from the Covenant Foundation augment my program budget) which I had already cut into 6” squares, prior to the lesson. Before distributing any materials, I teach about the symbolism of the hamsah and show examples. I also caution students that the sharp metal edges can cut into skin. The artist’s first step is to trace one hand, fingers closed (or the thumb can stand out or both the thumb and the pinkie finger can extend out), onto the metal foil, bringing the lines for the wrist down to the edge of the foil square. After deepening the hand outline, students plan their decorative designing process. Using stencils and textures plates, students draw and rub to embellish their designs. After completing the design, the artist flips the hamsah over, and accentuates the lines from the back. One side is embossed (popped out) and one side is engraved (pressed into).
  After the design process is complete, the hamsah hand is cut out using an ordinary scissors (this is the time that cut skin is most likely). Some of my artists opt to add color to the hamsah with Sharpie markers; others keep the foil plain. Hold the hamsah, finger side up, and punch up to 3 holes in the bottom edge. Cut several lengths of picture wire, lace them through the holes and string beads onto the wire for the finishing touch. You can use this same technique for making a mizrach or a shiviti plaque and tooling foil is a dramatic base for mezuzah making.
Each hamsah is a unique piece of art, ready for prominent display. (Next TAPBB—Ashkenazi papcuts)
LBellet@ohds.org

