The other day, I uncovered our family baby carriage, polished the chrome, and folded the blankets neatly within. I am going to be a Bubbe! This baby will sleep in the same pram as did her Daddy. She will be wrapped in the same blankets, lovingly crafted by her Great-Grandmother. Honoring our past, brings us love in the present.
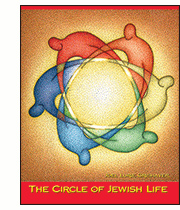
I was surrounded by precious memories when I received a copy of Torah Aura’s new lifecycle book The Circle of Jewish Life. I opened it directly to the part about baby naming, since that is where my family currently places itself on the circle. Yet, no matter what stage of life a family is at, this book brings into focus our history, our rituals and the connection we have, to one another, through our life cycle moments.
I am always pleased, and a little perplexed, when I receive requests for learning activities to compliment life cycle curricula. Pleased, because the content area is so very rich, perplexed, for the very same reason. There are, in fact, so many experiences we can offer our students, to honor each stage of the life of a Jewish family.
This year, our school community is fortunate to have many babies, newborn, or expected shortly. When their teacher is pregnant, students rush to me, eager to make a wimple.
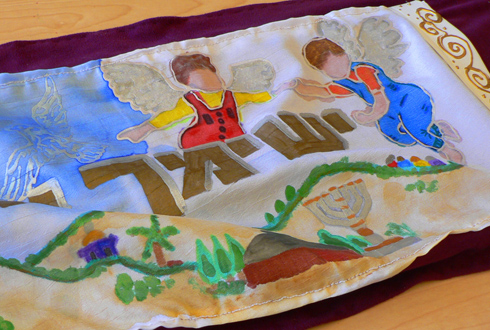
Traditionally, in pre-Shoah Eastern Europe, fabric from the clothing that swaddled an infant at his brit-milah, was made into a wimple: a Torah binder. The wimple next wrapped the Torah at the child’s consecration and at his Bar Mitzvah, and was included in the fabric to make the wedding chuppah. Almost extinguished during the Shoah, the tradition of the wimple has been revived in contemporary Jewish culture. Now, we make wimples for both boys and girls. Sometimes the wimple is still made from the swaddling cloth. More commonly now, the baby is swaddled in the wimple itself.
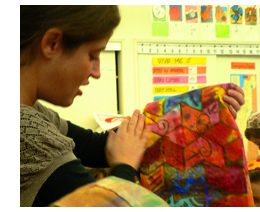 My favorite way to make a community wimple is to begin with a long (66” – 72”) piece of silk, or polyester blend, a foot or so, wide. I usually find a shape that pleases me (recently a Magen David or a dove) and stencil it repeatedly onto the fabric so that there will be enough spaces for each child to paint one area. Before giving the wimple to the children, I outline each stenciled area with a fairly thick line of acrylic, fabric paint. Each student can select an area to paint. I give them fabric dye (Dyna-Flow by Jacquard), which they apply with brushes or droppers. I ensure the look of the wimple by offering a carefully selected palette of colors that blend well together (warm: reds, yellows and oranges; or cool: blues, purples and greens). Despite the ‘resist’ outlines, the dye is likely to escape its boundaries and using colors in the same families prevents a muddy look.
Alternatively, children can use Crayola fabric markers (currently on sale if you click and order now). If you want them to bleed, for a dyed look, you can brush over them with a broad wash of water. Either way, save a large swatch of your fabric for you, and the students, to practice on. You can get textured effects by sprinkling ice cream salt on the wet color. (For an example of a finished wimple, scroll to the bottom.)
If you prefer not to use silk, take a look back a few weeks at my column that described the ‘bikkur cholim’ quilt. You can use the same technique, giving each student a fabric square and Crayola fabric markers, and iron them onto a lighter piece of fabric for the wimple base. Remember to always be certain to cap these markers securely for a long marker life.
As you progress through your Circle of Jewish Life curriculum, students can create beautiful siddur covers for consecration, a yad, onto which you can tie a fringe, for Torah reading (check out the materials offered by Dreidelmaker), squares to put together to make a chuppah for school events and a yahrzeit candle cup to remember loved ones who have died.
As always, if you need more ideas, let me know! Also, share your own ideas by commenting below.